1972 Gottlieb World Series Pinball Machine - Playfield Restoration Part 2
This post will document the restoration of the playfield. I will wrote two
other posts about this machine. One was about restoring the cabinet and the other was about restoring the backglass.
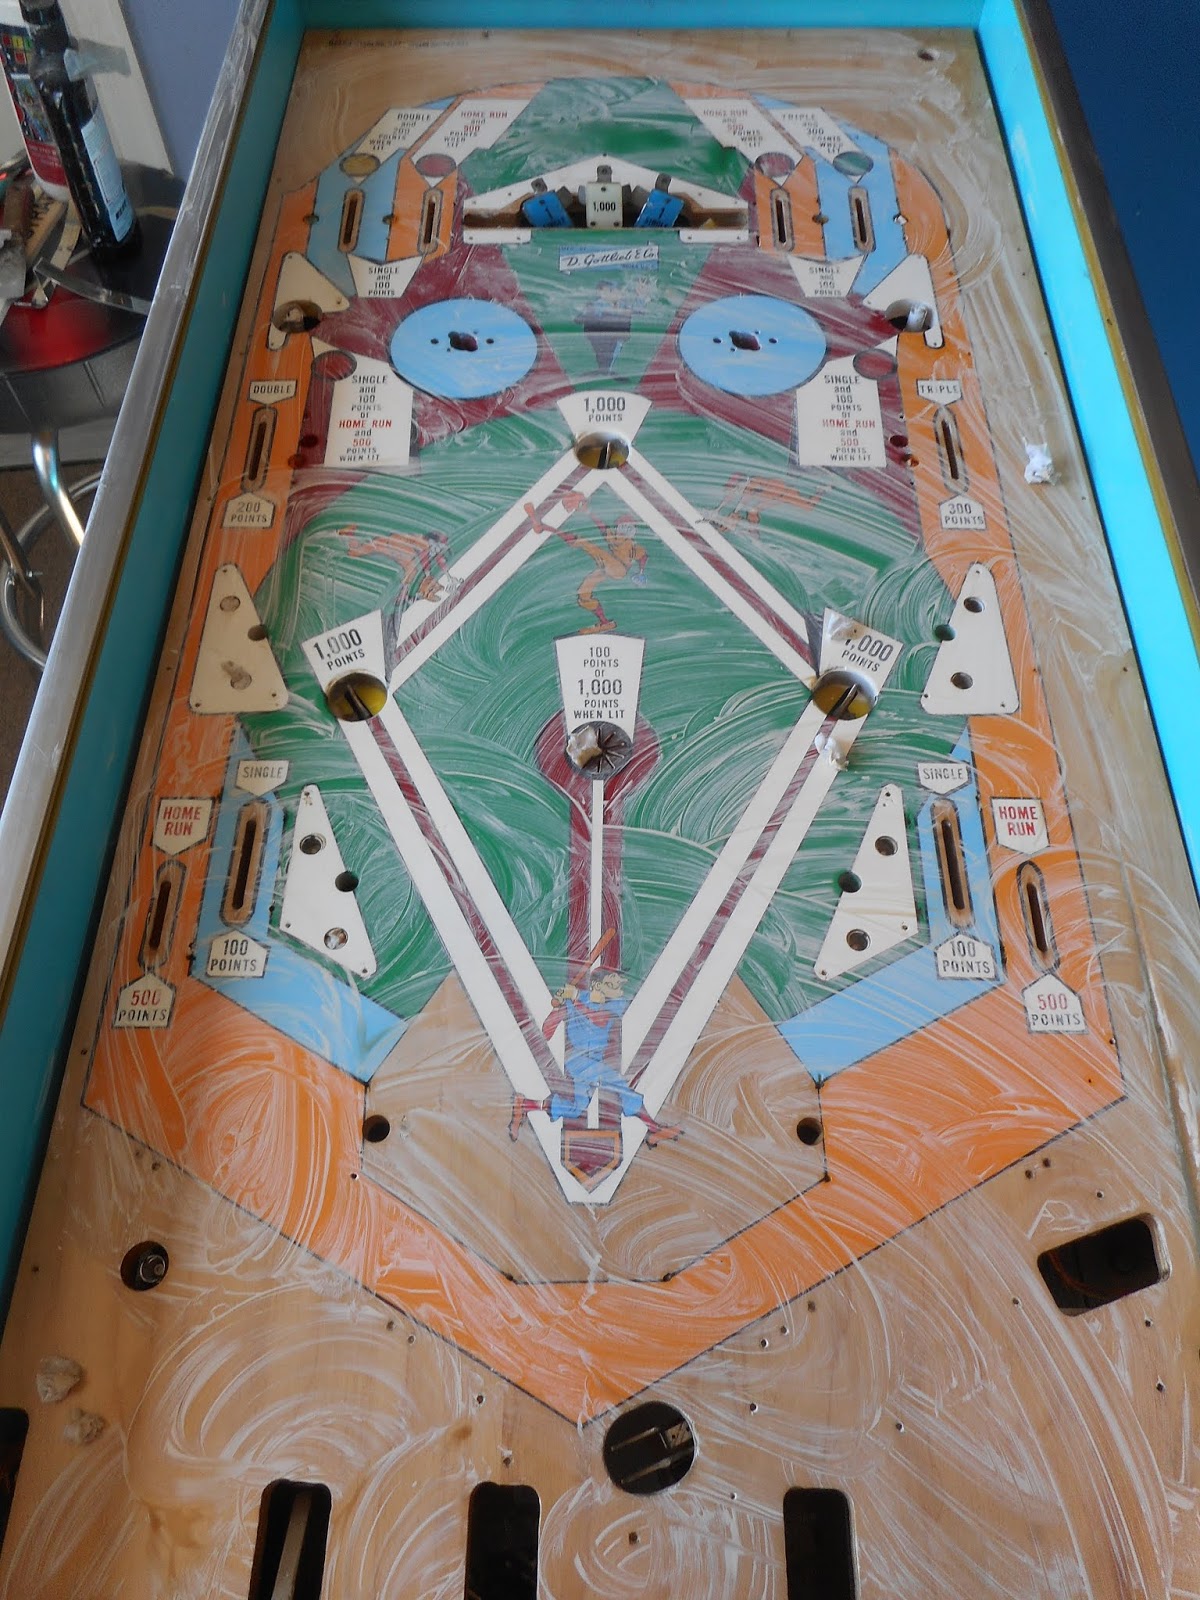
I left off the last post here. All of the colors are added to the playfield. I cleared over this layer of paint to protect it and to provide a base layer for the decals. Next, I need to work on the decals for the playfield.
Original photo of the batter. You can see how damaged he is.
Here is the new cleaned up version of the photo. I brightened the colors and cleaned up the lines in a computer program and now it is ready to be printed as a decal.
Once ready I printed them to check their size. I compared the tracing to the printed image until they matched perfectly. I then placed them all on one sheet and printed them. Next I used images taken before sanding to create and clean up all decals of the text.
Here are samples of all of the decals laid out on the playfield.
Here is the playfield with the decals. I cleared over the decals with 3-4 coats.
Next I polished the playfield. It was much easier to polish it without all of the components and posts getting in the way and getting bits of polish on them.
Here is the finished playfield reassembled. It looks beautiful and plays great. Check out the videos at the top for game play and game features.
The buyer was happy with the machine and excited to get it home and add it to his collection.
1972 Gottlieb World Series Pinball Machine - Playfield Restoration Part 1
This post will document the restoration of the playfield. I will wrote two
other posts about this machine. One was about restoring the cabinet and the other was about restoring the backglass.
The playfield is not terrible, but the buyer wanted it to be nicer. With the damage to the unpainted sections at the top and above the flippers, the planking in the center sections, and the very geometric nature of the playfield design. I suggested a total repaint. It would really be the only way it ever looked new again.
Even though I thoroughly cleaned the ball track at the top, it is still an eyesore and will just collect more dirt.
The white has faded and is dirty, there are small bits of paint missing from all sections.
The balls made deep divots at 3rd base and 1st base from being kicked out over the years. Painting over the bare wood would have still left a hole there. In this picture you can see the planking in the green section pretty clearly and the damage above the flippers as well.
I pieced together some tracing paper and traced every line to be sure to accurately reproduce the playfield.
I traced the general outlines of the figures for size comparisons and positioning later.
Here is the finished tracing. I stored it on the wall to keep it safe.
I've included these pictures because It is always an interesting process to sand a playfield. It feels so wrong to some degree, yet the wood looks so beautiful when it is done. The sanding helps with an nicks, scratches, divots, and even helps to level the inserts. None of the inserts were in need of replacement or sunken in too deep.
The bare spots retained some of their darker color. The top layer of the plywood is not thick enough to allow deeper sanding.
Here is the before of the ball track at the top.
Here it is starting to disappear. Again the color difference of the exposed wood was much deeper than the paint layer.
This was as deep as I dared to go. The playfield started to wear through in a spot, so to be safe, the color difference needed to stay
Before I paint I put down some layers of clear to seal the wood. I plug the holes with cotton cloth rag pieces. Same thing with the light sockets to keep paint and clear out of them.
The following pictures show the playfield with all of the penciled in lines. On the last playfield I did, I put the lines under the clear. This time I put them on top of the clear and they were easier to cover with the paint. Again, I punches small holes strategically throughout the tracing. I used a straight edge to make the lines exact.
Here I am taping off the sections for the green. I try to start with the darkest colors and then move towards the white to keep the lighter areas clean. I use Frog Tape as it is easier to work with and more effective for me than frisket.
Finished green. The lines are sharp and mistakes are minimal with the Frog Tape. I used 4 large rolls to complete this project. It isn't cheap, but is worth it to me.
Finished red.
Finished orange. It looked a bit bright here, but I wanted it to not look faded out like the orange of the original playfield was. It is almost difficult in pictures to see which parts are orange and which parts are bare wood. This brighter orange that I mixed worked much better, especially after the black lines are added.
These are the finished white. This stage was very difficult to tape off due to the quantity of white.
The following pictures are the finished black. Some lines I did by hand, but there were so many straight lines, it was much easier than playfields in the past.