The first video has a silver ball. The second video has a white Powerball. The powerball is ceramic, so it is lighter and travels faster.
I found this machine on the internet by searching for machines with good spinners. The artwork on this machine is very different from other machines of the time. Williams was known for this strange style of art with very angular people. I don't appreciate that style, so a lot of Williams machines are not very attractive to me. I watched some gameplay videos and decided to add this machine to my wish list. I got a random message from a friend in pueblo that he had a couple of EM machines for sale. When he told me he had a Blue Chip, I jumped at the chance.
When I arrived to take a look, the machine was working, but barely. The glass was pretty nice. The playfield had some pretty serious wear spots. Not knowing when I would find another Blue Chip, I brought it home and stored it while I was working on some other machines.
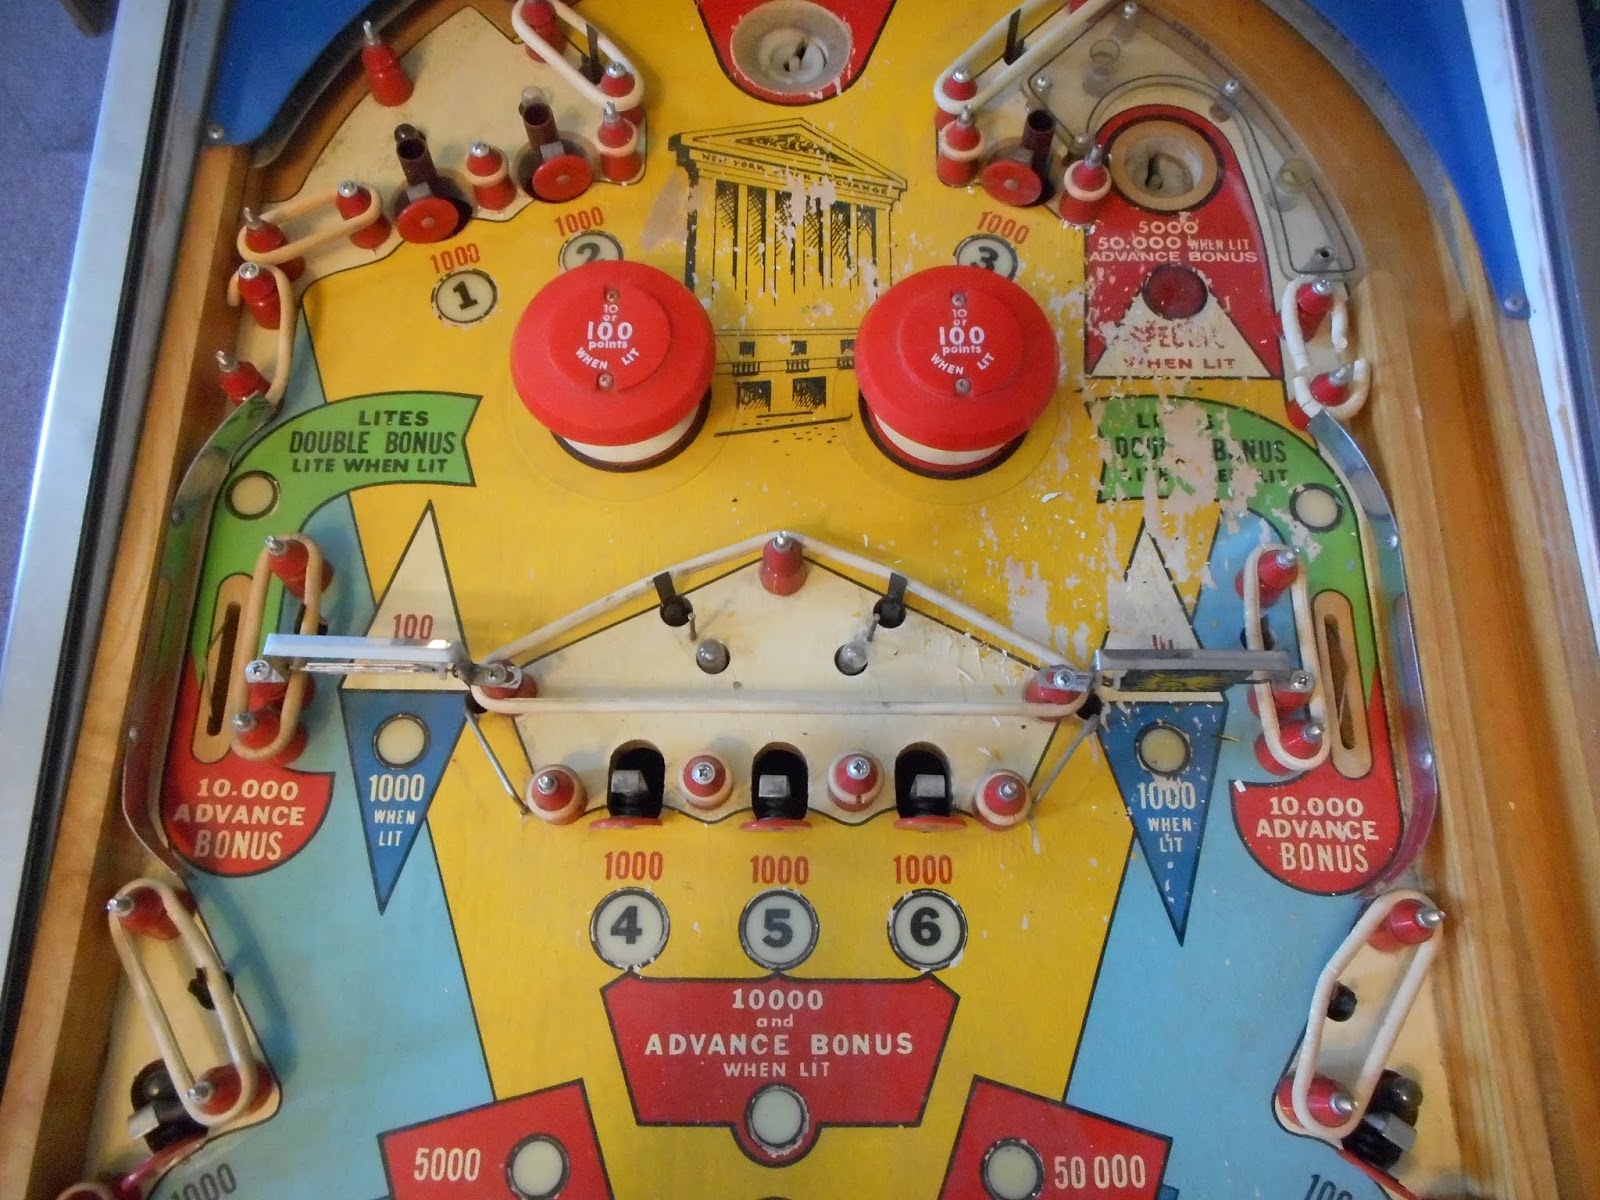
I pulled the machine out a couple of weeks ago, and this is what it looked like:
The worst part is the upper right section of the playfield. The rest doesn't look too bad upon first inspection. However....
It seemed to be getting worse by the minute. In this last picture, you can see paint flakes and you can see how cracked and loose the paint was in this area.
Then....
My son was toying with the idea of running a chisel over the paint to pull up the loose stuff. I didn't think he would do it, but before I woke up, it was done. I started to melt down, then I looked closer and rubbed the chisel over the paint myself. The paint wiped off like wiping chocolate pudding off of the counter top.
Just in this one section, there was yellow, red, white, green and two shades of blue. The entire pallet of the machine was represented. Color matching is tough. Trying to seal this much loose paint on the rest of the playfield and then trying to match colors seemed impossible.
Time for plan B....
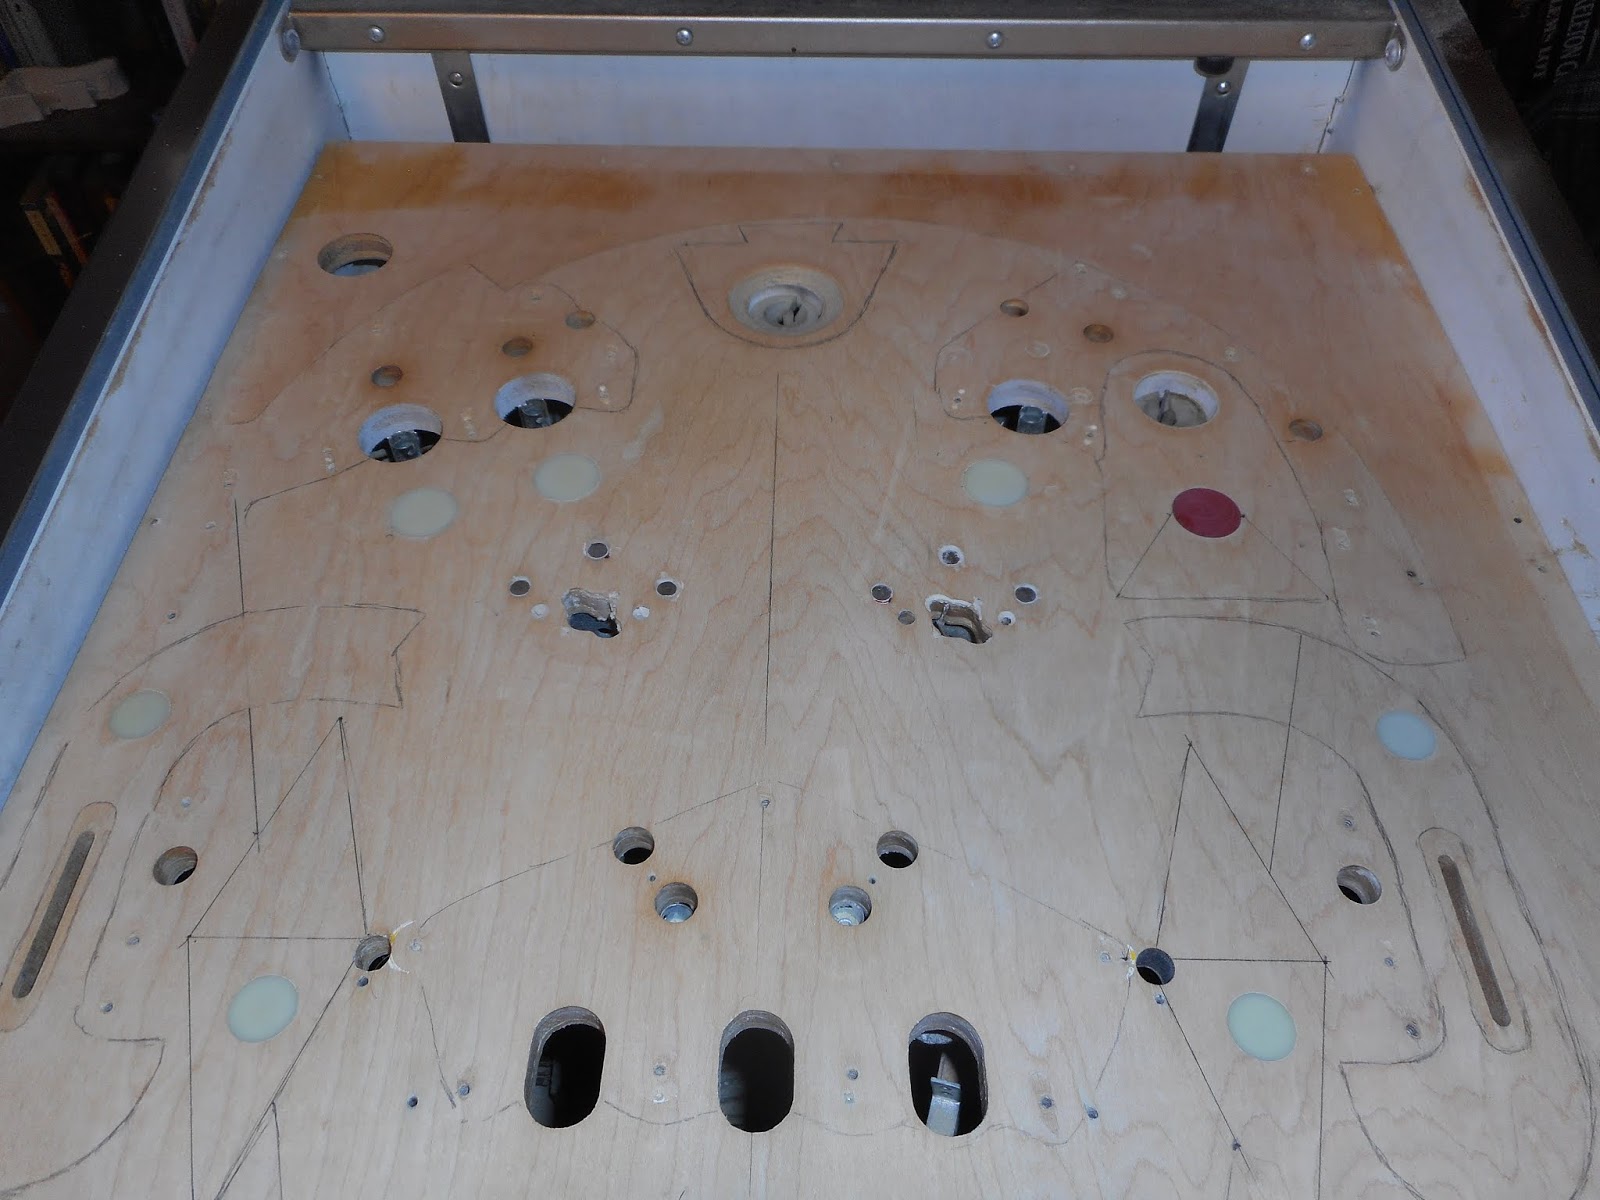
We used tracing paper to trace the outline of the playfield so we could sand it down and repaint it. This is my second playfield sanded down to plain wood. The first was my custom Wrestling Superstars machine, which is still bare wood until I finished my design. The second was my custom Black Pyramid machine (a mixture of one machine and the backglass from Black Pyramid). I am still not totally satisfied with the plastics, so I haven't posted this one yet. Look for these later.
Next...
We used canned air (upside down) to freeze the glue under the mylar popbumper cirlces. They pulled right up. Next we used the flour and alcohol rubbing trick to remove the adhesive from the playfield. It makes a mess, but works pretty well. I've found that 90% alcohol works best.
I was still holding out some hope that we could save some of the playfield, at least as a painting guide. I started sanding with some very fine paper hoping the loose paint would come up and the solid paint would stay. Wishful thinking. What I ended up with was large patches of missing paint that had mostly flaked off leaving significant ridges between the bare wood and the paint. These would not cover with new paint, they would remain visible, which was unacceptable.
Oops.....
We had some loose inserts that needed to be reglued. Used wood glue and clamped them with wood blocks with wax paper in between to protect the playfield. I purchased a cool 12" clamp at Harbor Freight and was just waiting for a moment like this to use it on the double bonus insert.
Next we started sanding...
Well, the sanding didn't go well as I described above, so it went down to bare wood. Next, we used the tracing paper to create some guide lines on the playfield in pencil. I cleared over the pencil to keep it in place. Next we used frisket on the inserts.
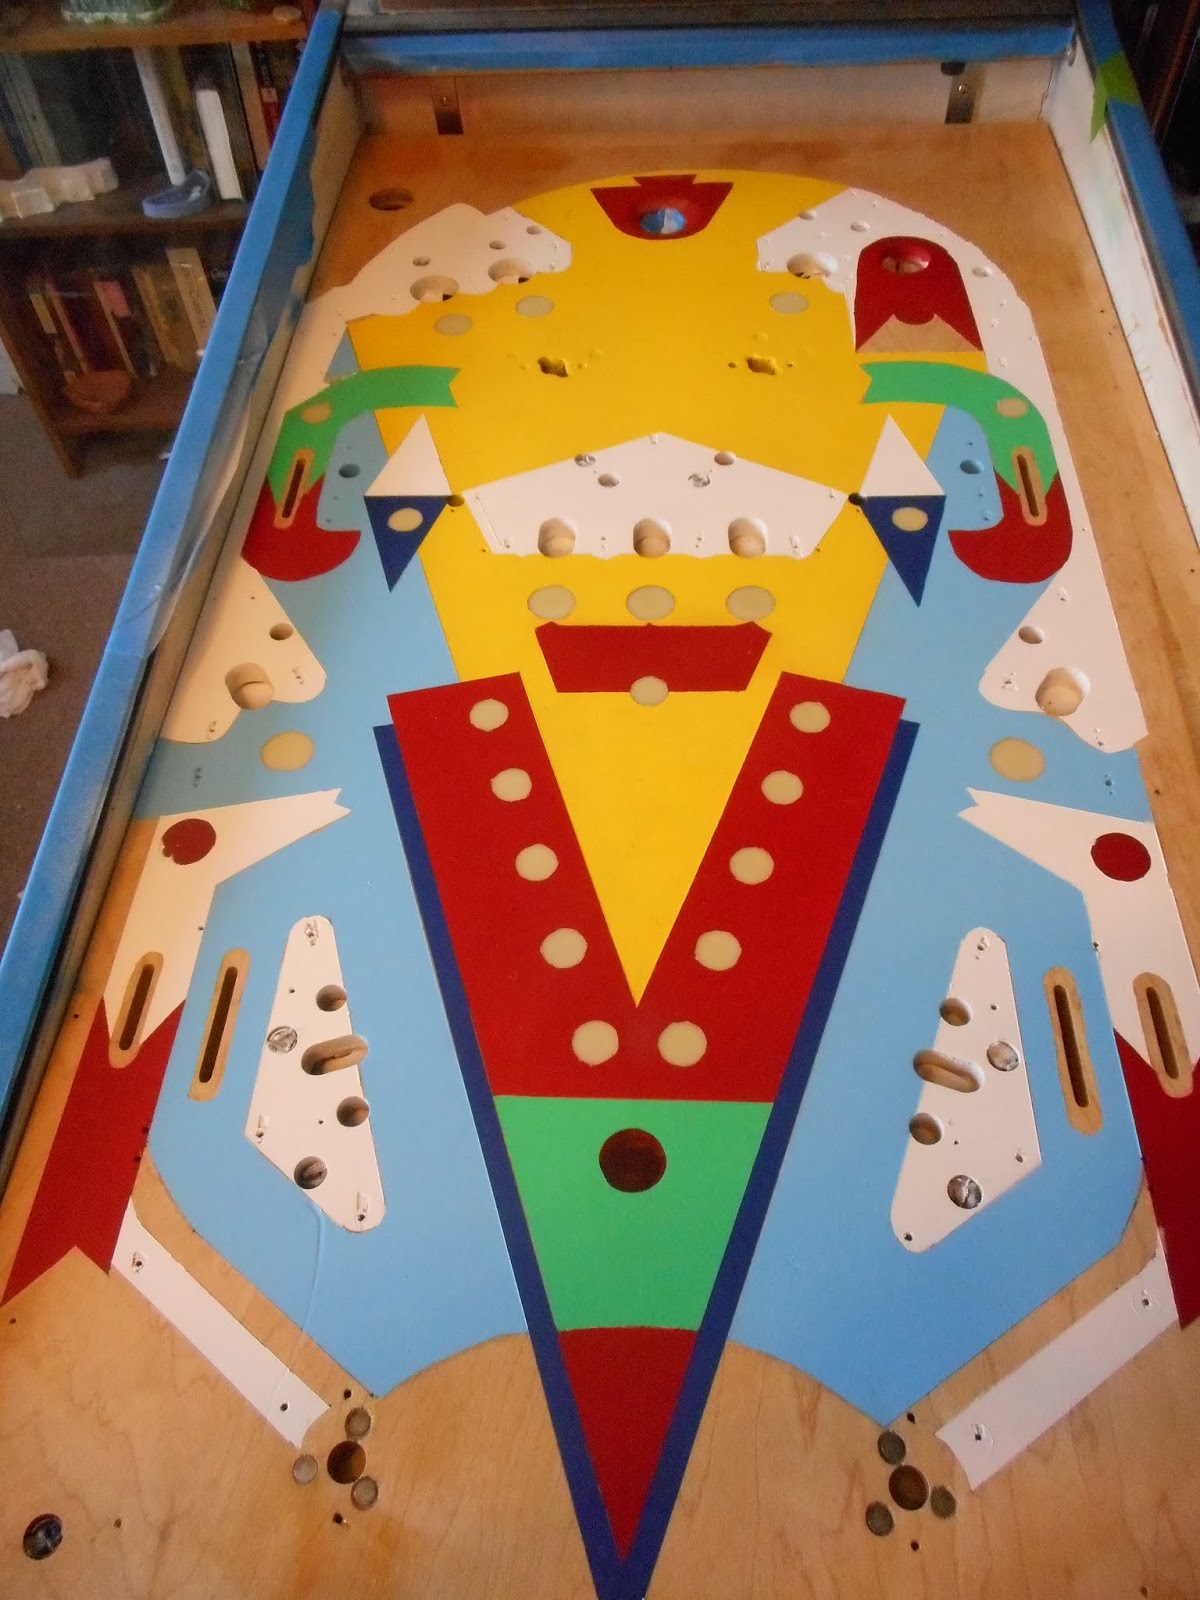
I used Frog Tape to mask the straight lines and I used frisked where I would need to have curves cut by hand.
In theory this should have worked....
Continued to tape and then started spraying. Used a hairdryer to set the paint in between coats.
We removed the tape and the frisket after spraying each area....
The frog tape created some crisp clean lines...
The frisket was pretty messy. For some reason it was not sticking nearly as well as we needed it to. We abandoned the frisket at this point and decided to try some other options. I attempted to clean this up around the edges with an exacto knife, knowing we would be painting other colors around the edges anyway.
Next we moved on to yellow...
then to green...
Then blues...
Then white. The lighter colors are supposed to be last so they don't get dirty. I did have trouble keeping the yellow clean, especially using newspaper as a masking material.
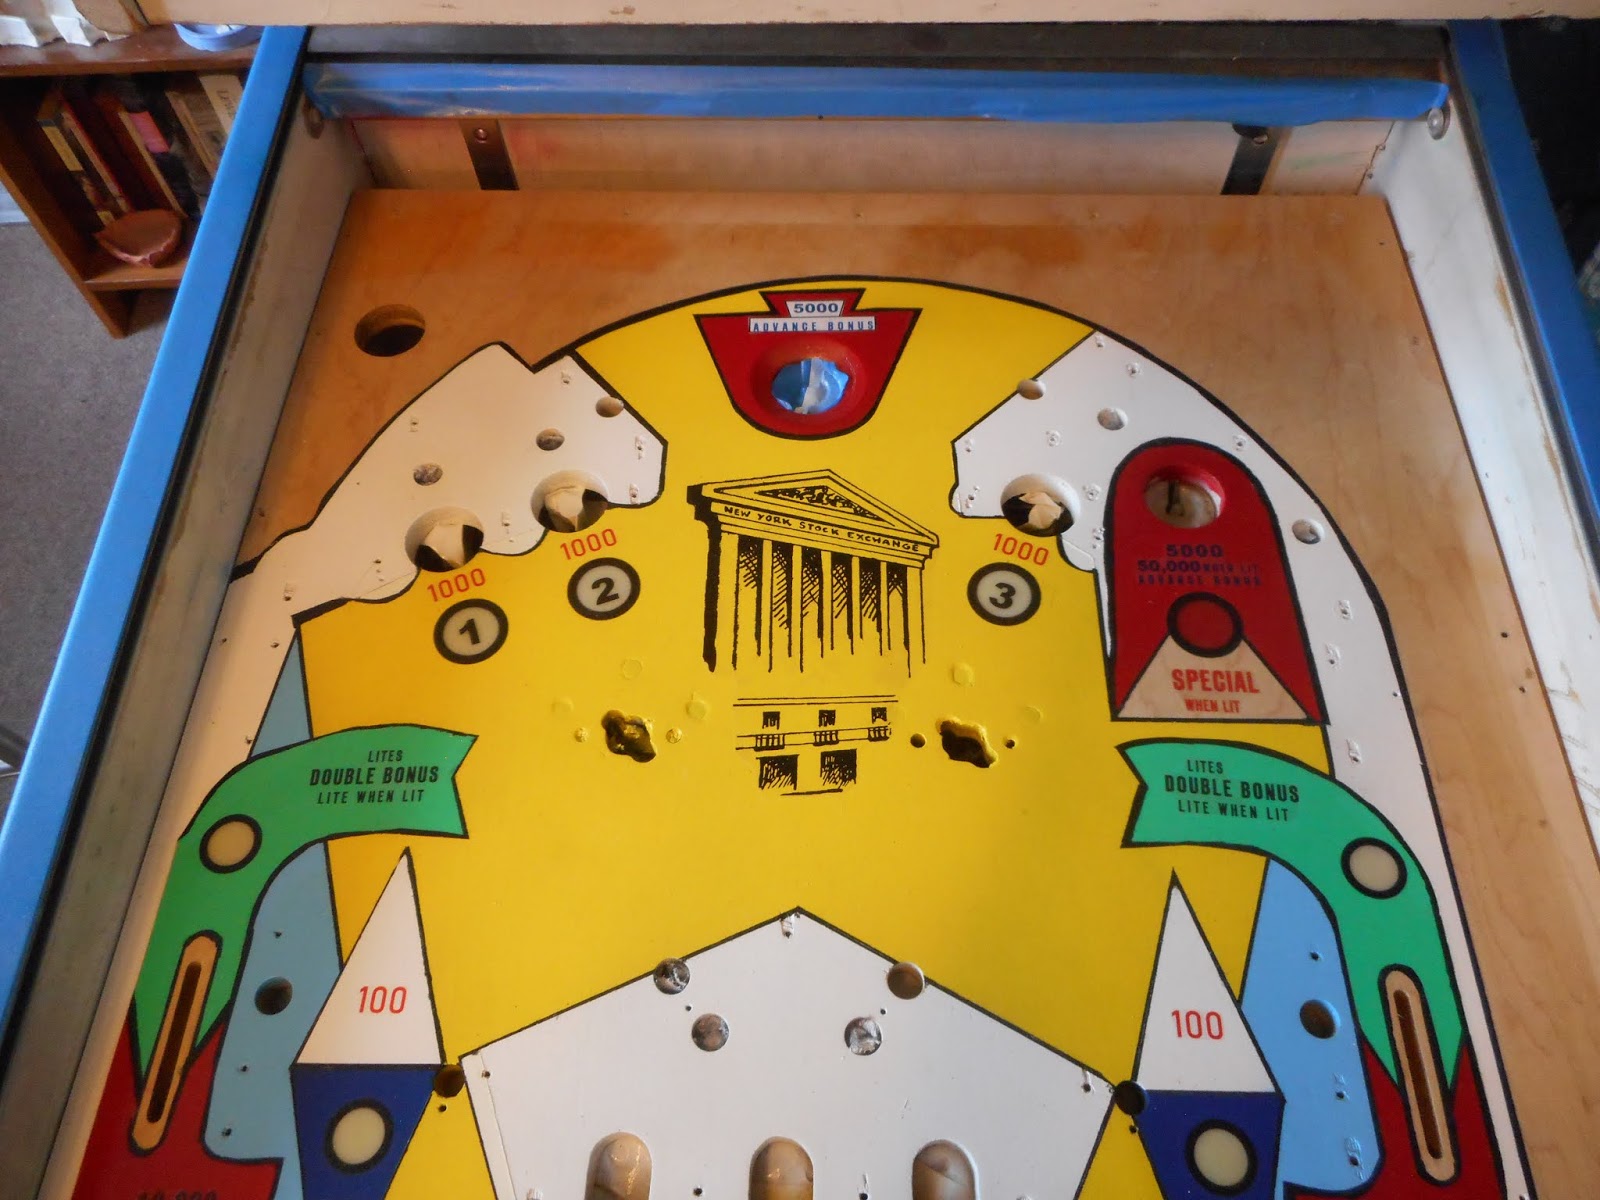
After the base coats were finished it was time to put down a layer of clear before I applied decals.
I then started to apply decals....
These are waterslide decals printed with a laser printer. I then coat them to make sure the ink doesn't smudge or run in the water. If you take a close look at the double bonus when lit decal on the green, you'll see that the decal material is visible inbetween the words. Decals need to be cut very close to the image.
My plan was to print straight line decals and apply those to make the key lines around the colors. When I cut the decal lines straight up to the line, they were too fragile to get straight and flat. When I left a boarder of clear on each side, they went down better, but you could see the clear on each side. Neither option was going to work. In the end, I decided the only way to get the key lines would be to paint them.
Back to tape and paint. This time, no spray, just hand painted. Black tends to hide the brush strokes pretty well.
Some came out well. Others were a little wonky. Sometimes thicker than they need to be, sometimes they were a bit dirty where the tape wasn't perfect.
I found that cleaning up rough edges wasn't too hard with these tiny brushes and some Naptha. I know it isn't perfect, but once the plastics are on, I think the inconsistencies of the lines will not be as noticeable.
I thought I was done here, but i saw that the bottom of the left red outlane needed lines.
Finished and clearcoated with Varathane. I don't use 2 part auto clear coat. I don't want to invest in the equipment or die early. These machines were originally given a clear coat. Today's clear in a can must be superior to yesterdays clear. If I replace the balls as I should and keep the playfield waxed, wear shouldn't be an issue. I've heard great things about auto clear, especially that it creates a perfectly flat glassy surface that is super hard and durable. I also hear complaints about Stern's new machines having issues with their clear coat. The fact is this machine will not be worth $3000 when it is finished, whether I use auto clear or not. Sometimes an investment in a machine needs to be moderated by the value of the machine. This machine is going into my personal collection, and it was a project I could work on with my son, so the time and effort were worth it. I wouldn't go to this extreme if I planned to flip it with the hopes of making a small profit.
Now it is time to get back to the decals...
The first spinner was in pretty good shape, but had some wear. The second shows that it was a replacement spinner from another game, I think it is Williams Blackout. It was time to apply the decals, but the white back ground on the decal was too thin to cover the black. Soooo.....more paint.
Then applied a first level of unprinted decal...
Then the final printed layer with a clear coat....
Next, I had to spend a lot of time on the stock exchange decal. There was no way I would hand paint this with any degree of accuracy. Here is what I did. I know you will probably laugh, but it turned out okay. I don't have fancy art programs (even free ones) so I used the tools offered by Microsoft Paint and Microsoft Word. My daughter laughed at me. I get it. But it worked.
Here is the picture I took from the playfield of the original art.
Then I started to clean the image up in Paint. There is a feature in Microsoft word where you can take an image and make it black and white. However, the yellow in some areas is too dark and shows up as black, and some of the black is missing.
Going through these steps I cleaned up the image so the black was filled in and the yellow that turned to black in Word I erased. The bottom section was harder all all of the yellow showed up as black.
So here is the finished image. It doesn't look great, but when you change it to black and white it covers all of the differences between my touch ups and the original image.
Here is some work I did on the ticker tape machine in the center of the playfield. To be honest, I didn't even know what it was until I studied it. I though it was a vacumn tube or some kind of classic light bulb. This is a machine that would print out thin strips of paper with stock prices on it. Again it was converted to pure black and white in Word. I had to delete all of the blue so it would not turn it black.
I printed it as a white background decal and placed it on the playfield with the paper strips.
Then I painted the bottom section blue over the decal. After that I printed a clear decal and placed that on top of everthing so the black lines would show in the blue section and the black would be sharper everwhere.
So here it is with the paint and the decals finished. I couldn't print white text, so some areas are blue text (though it looks pretty dark on the red backgroud, and some are white backgrounds with blue text.
It has 4 coats of clear on top of the decals. One thing to avoid in the future...I have three cats and we had a lot of fans on when we clear coated. We ended up with some hair in the finish. Again, you can't see it when you play (unless you have superman eyes), but it is there and can be seen when you look close. Something I won't do again.
Here is the machine finished with the plastics and new rubber after a coat of wax. I use Millwax.
There were a lot of issues inside the machine as well. We replaced the bridge rectifier, rebuilt the flippers, rebuilt the chime unit, cleaned the stepper units and contacts, installed new end of stroke switch, new ball (also bought a power ball for fun), replaced bulbs, adjusted switches to speed up the pops and slings. I also installed new flipper bats as I prefer yellow bats in my Williams games.
This game plays great, either with a silver ball or a white Powerball. Definitely a great addition to my collection.
This machine was a cool find. I have fond memories of bowling as a kid. I had a Big Brother from the Big Brother's/Big Sisters program named Richard who used to take me bowling. I love the center rollovers of this game that represent the pins. I love the idea of strikes and spares. The organization of the bottom is unique and quite fun. This machine is a great example of 1960s pinball at it's best. The artwork is Corny/Cool. The colors work well together, and the game played well.
I replaced the backglass with a plexi replacement. It looks wonderful. The old one had way too much paint loss to salvage.
The game had a bell in the back box instead of chimes.
The balls drop down into a ball trough in the cabinet. There are tunnels under the playfield where the balls can drop through the "Gobble Holes". With this vintage machine, you could play all five balls at once if you wanted to. You can lift then plunge balls at your own pace. The trough releases all of the balls down to you when you start the game (like a Skee Ball machine).
This is the coin door. The cabinet was pretty worn, but the original paint is pretty desirable by collectors. I would have preferred to repaint it myself if I kept it. The silver button on the left is the start button. The coil slots are horizontal instead of vertical with a flatter arrangement inside the coin door. Underneath the plunger is the lift rod (it is missing the knob). You push on this rod to manually lift a ball into the shooter lane.
Here is the inside of the cabinet with the score motor and relays.
Here is the underside of the playfield where you can see the silver tunnels that the ball travels through when it exits through the "Gobble Holes" on the playfield to return to the ball trough. When a ball goes through the "Gobble Hole", you lose the ball, but score points.
Towards the top of the picture you can see a nearly horizontal oval. This is a window to look down into the ball trough which tells you how many balls you have left.
Here is the playfield. The holes on the outside of the pins are the "Gobble Holes" and have a flap to ease the ball down into the tunnel under the playfield.
In the left of the apron you can see the hole that allows you to see the balls in the trough. if the sides of the border around the hole are highly polished, you get a reflection like a mirror of the balls. You can see this a bit in the picture.
The cabinet art is pretty basic and doesn't really reflect the bowling theme.
This machine came with its original paperwork, always a cool find.
If you look closely at the instruction card in the above picture, the game is designed around the award of a replay. Everything you are shooting for in the game is less based on points or free balls. When they designed this machine, a replay was a very cool reward for scoring features on a game. Williams probably never expected these games to survive this long or to eventually become part of a home collection. When you own the machine and put the machine on "free play", a replay is not very exciting. If the game could have been adjusted to score extra balls or points for specials, I would still own this game. However, when a game is so focused on replays, it can get old quickly in a collection. If I ever own one of these again, I will probably try to redesign some of the relays to make it an "add a ball" game.
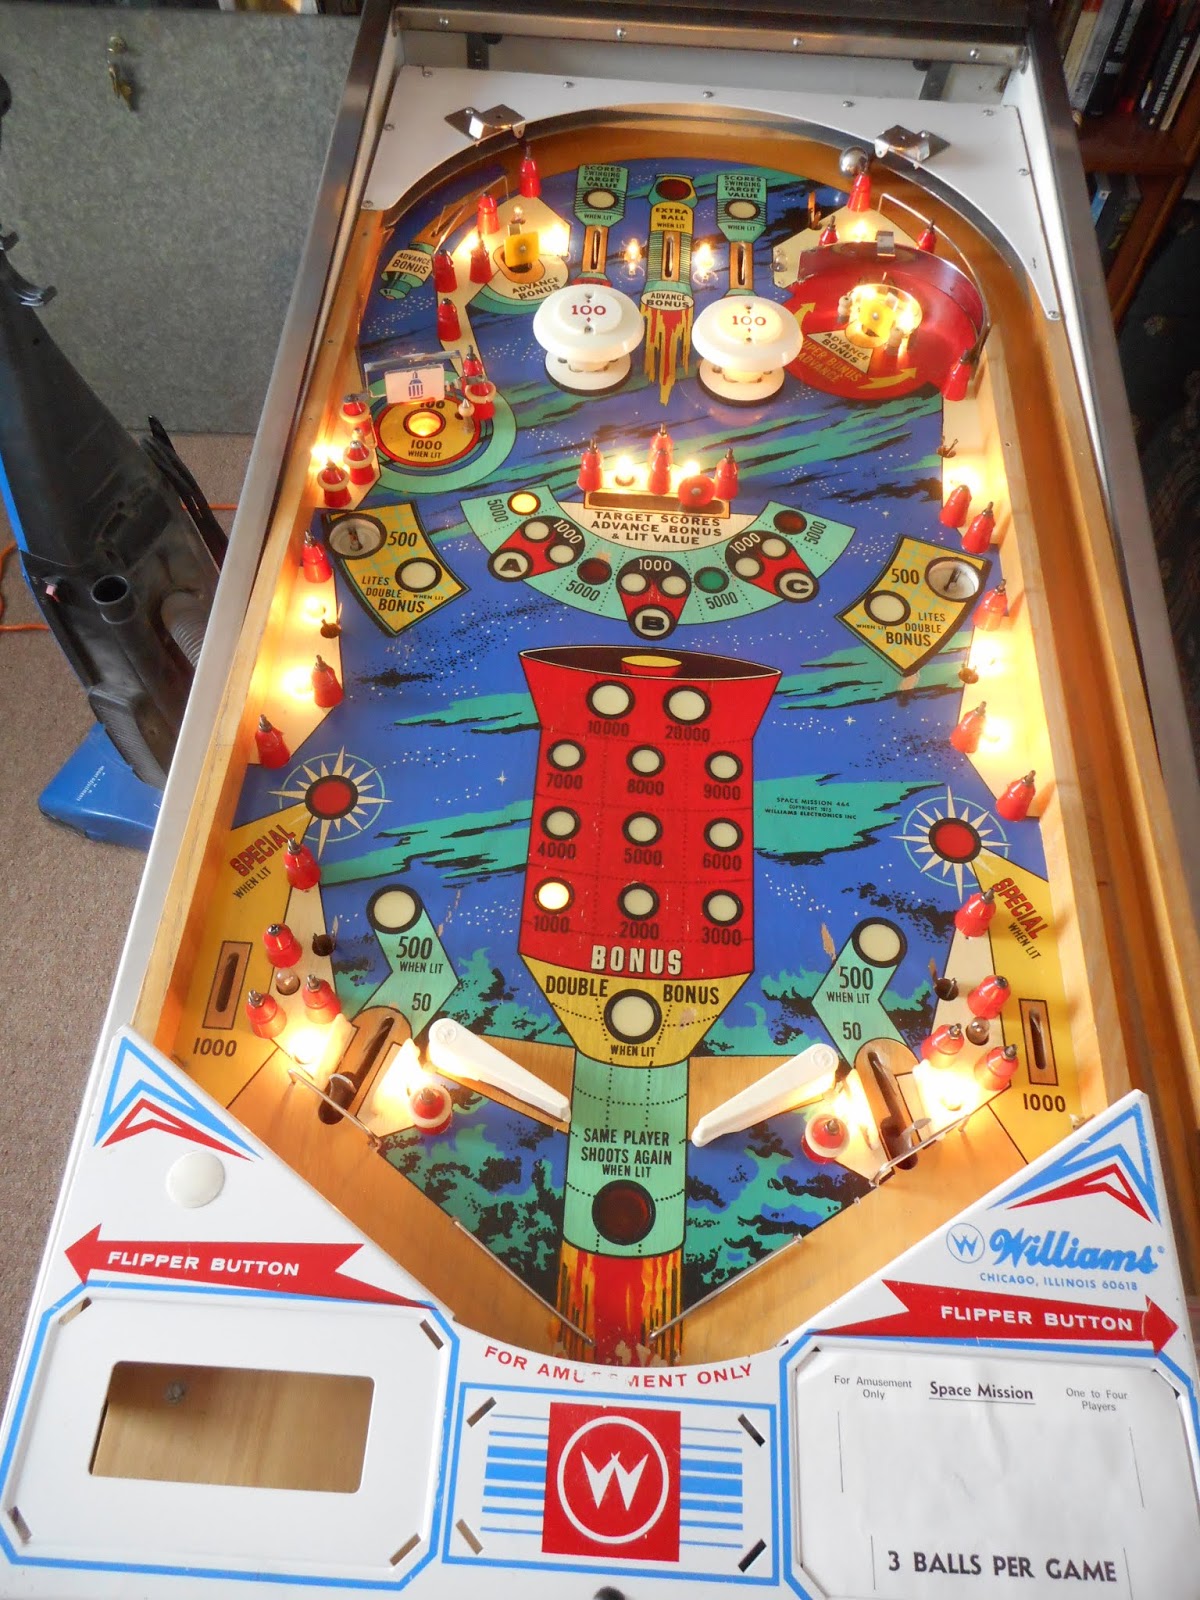
I bought this Space Mission for myself. I love space themed games. I'm not sure why as I was never really interested in space travel, science fiction, or the space race.
Anyway, this one looked cool. Didn't work. Long story short, put in a lot of time and came to the realization that I didn't like the kick out holes instead of sling shots on this game. Again, I considered altering the bottom of the playfield, then changed my mind and let it go. Very cool artwork and great design. Played great, just wasn't a fan of those holes.
I purchased this one for my personal collection. Great artwork. I really enjoyed the game, but eventually became frustrated by the lack of purpose of the left side of the playfield. It was a drain waiting to happen and there weren't enough points to justify shooting the ball over there. I went back and forth. I decided I'd add a ramp to replace the traveling ball/clone chamber section with a habitrail that looped back to the right flipper. I bought the parts, then decided it was just time to move on. Perhaps something I'll do another time.
The rectifier board was a mess. It had a few hacks that kept it working, but it really needed to be replaced. I put in a Rottendog board.
I also had to repin the connectors.
It worked well and was fun while it lasted. Still probably the best artwork out there. Very cool backglass.