Custom Rethemed WWF Wrestling superstars Pinball Machine
Display box backglass
Rethemed/repainted playfield
Side art isn't finished yet. I'm still considering some options.
Game play video
Retheme video
THE PROCESS
Here is a side by side comparison of the new and the original. The original machine had artwork that was very sexualized and wasn't going to stay. The machine had been in storage for quite awhile. I believe it was on route for a couple of years, then placed in storage. The top of the playfield was very dirty, but it was mostly dust from being stored under a heating/cooling unit.
Next came the tear down process.
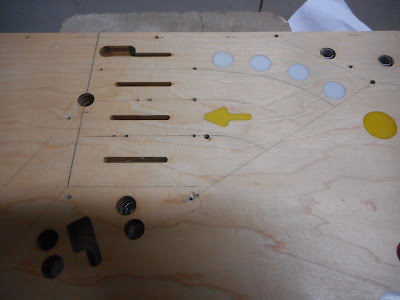
I removed everything from the top side to prepare for sanding.
I didn't strip the underside of the playfield, I just detached what was poking through to the top side.
I used compressed canned air to remove the mylar circles around the pop bumpers. I started to used the flour and alcohol method to remove the glue, then decided to just sand it off.
Here you can see the inserts were slightly cupped causing that artwork to be the last to come off.
I sealed the playfield with a can of clear, then reassembled it. The machine stayed this way for over a year as I played it and enjoyed it. During this time I worked on some designs for the retheme. The first idea was a Millennium Falcon machine, which I think could have worked well. I was going to make the top center inserts spell falcon and have Millennium appear above it. The left three inserts were going to be the three primary pilots, Han, Chewy, and Lando. Some of the different features would be the castle run and perhaps the worm hole and light speed. In the end, I decided to go a different direction.
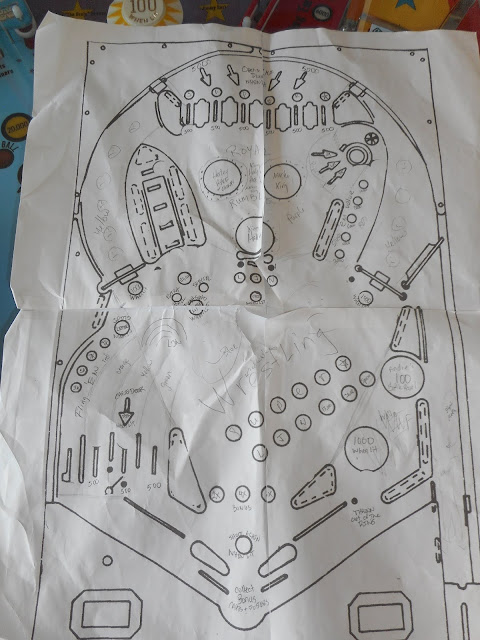
I made a blank template from a playfield diagram. I then recorded all of the words and values from the last machine
Then I drew out my Wrestling Superstars theme with possible words/features.
Then I came up with a color scheme. I did this with crayon just to see how it might look.
So I stripped the playfield again and drew lines on the playfield to show where I wanted the different colors of paint to go. I was going to use Frog Tape as I haven't had a lot of success with frisket.
Here I have taped off the center blue section and used an airbrush to do the blue paint.
I do use frisket on the inserts. Here i have removed the frisket. If there is any paint leakage, I clean off the inserts.
As this is a "stars" machine, I decided to use stars at the boarders of each color. I am not skilled enough to use transparent paints and fade the colors into each other. I thought these small stars would do the trick. I borrowed a star shaped hole punch and punched holes in frisket. Again, the frisket let me down. The stars looked terrible. What finally worked was to put together layers of blue painters tape and to punch through the layers. I then painted the stars with a brush and when I lifted the paint, most times the stars were pretty clean and crisp.
Here are all of the colors. White was the hardest. It didn't want to stick very well. Some section pulled up with the tape.
Here is the playfield after the clear coat. I don't have a paint room/booth, so occasionally there was hair or other dust in the paint. I needed to touch up some areas by hand, but most areas worked well. I used Createx Airbrush paint that I usually buy at Blick Art online.
Everything else on the playfield is a decal. The decals are all custom from artwork I found on the internet or created myself. Some of the artwork was heavily edited.
The plastics I created with decals as well. They have a clear decal underneath printed backwards and then a white decal over that. They are the original plastics on this machine. I removed the original paint. I did create new plastics for the uppermost plastics from Lexan. It was much easier to work with than the other plexiglass I have worked with in the past.
I replaced the pop bumper caps to better fit the colors and theme.
I replaced the posts on the right pop bumper section and the middle posts near the sling em' turn around with double rubber posts to mimic ring ropes. The rubber is from Titan Pinball. I put in some LEDs in the pop bumpers and put color change LEDs in the large LJN inserts to match the rainbow theme of their logo. I get all of my LEDs from Comet Pinball.
I edited the original instruction card to show the correct letters from the playfield inserts. I created a new free play Wrestling Superstars card for the right.
The cabinet was lightly sanded then repainted.
The backbox was its own adventure. The original glass was destroyed, so I needed to decide whether to create new glass or do something different. I decided to create a display case in the backbox instead of creating a new glass.
The first thing I did was build a new door. The old door was removed and I built the new door from a higher quality plywood with a nice top layer. I cut out slots for the displays and created new light shields based on the old ones, but built with plywood instead or cheap particle board. I painted the inside of the display cabinet and then hand painted the ring posts and turn buckles. I used an old stretched out set of ropes behind the figures. I have the figures attached right now with zip ties, but may come up with a better idea later.
The ring apron on the bottom of the display cabinet door is a combination of two recreated ring stickers for the Sling 'em Fling 'em ring purchased online. I am considering using my ring to create a topper in the future.
The lighting of the back box is regular #47 sockets for the feature lights. I then used Matrix strips from Comet Pinball to light the display box. In order to avoid the lights blinding the player, I mounted the lights to the slanted wood strips attached to the door.
Here is the back of the cabinet where you can see the zip ties coming through the back and the loose sockets that the Comet Pinball Matrix light strips are attached to. I didn't want to re-do all of the cables for the displays, so the displays are numbered upwards instead of downwards. Only one display didn't fit. We cut the wires, rewired one plug and spiced them together to created the needed space. The wiring doesn't look exceptionally clean, but is working right now.
The boards did need some minor work, but over all were in nice condition.
The sound board was working, but would sometimes flake out. It got worse until I eventually did some work on it. I couldn't get it running again, so I replaced it with this new universal board by Barakandl at nvram.weebley.com It works great.
There is an auxiliary light board that is not commonly being used. In the future I may use this to light a topper.
The backglass is actually an old Stars backglass.
I had an extra back glass because the original was in pretty poor condition. I ordered a glass that was in better condition and had one left over. I decided that instead of buying a piece of glass (quoted at almost $100) I would scrape the glass and use this piece.
When I scraped the paint off of the glass, the mirroring stayed behind. It was backed with copper. After doing some research, I found that I could remove the mirroring by scraping off the copper, then using bleach to remove the mirroring. I only removed the mirroring that didn't fit with the new theme. I thought the outside boarder, some of the stars, and the stars word at the top fit pretty well, so I left them.
Next I painted the glass. I realized later that I didn't number the displays, so I scraped the paint, created numbers with decals and repainted. The controlled lights needed transparent words, so I created decals, backed them with a blue layer to better match the glass (though it is marbled a bit) and then backed all of that with white decals. It works, but will still need some touchup to look better.
I damaged the glass in the process of removing the copper and mirroring. One source said to take it off with a wire wheel. I ended up burning the glass. I fixed this by attaching a WWF decal to the front of the glass.
No project is ever finished, but this one is at least to the point I feel comfortable posting it here for people to see what progress I have made so far.
Ideas for the future: Side art? Fix lit areas of glass? decals on drop targets? decals on spinners?


